Tuesday, March 31, 2015

Scrappy Moms Stamps March Release--Project 3

Happy Tuesday!!

Today I have another card to show you that features one of the new stamp set that is being released from Scrappy Moms Stamps.

For this project, I used the new stamp set titled:


I decided to make a fun little party favor or a fun little gift to give to someone for their birthday :) I love the Sassy little greetings on this set. For my favor, I used the lollipop die from My Creative time and added some balloons with some crochet thread for the strings and then added that fun greeting from Sassy Pants to the bottom.

Here is a closer look at the entire Sassy Pants set:

and in case you missed it, here is a look at the 
Zodiac Cuties that was also released:

Be sure to stop by and see our March Guest Designer, Georgiana from Carson's Creations 
as well as all of the Scrappy Moms designers all week to see projects showcasing these new stamp sets.
Tammy
Bonnie
Carri
Corri
Debby
JoAnn
Julie
Julie
LeeAnn
Stacey (me)
Sukie
Theresa

Thank you so much for taking the time to stop by my blog and looking at my latest creation!
I appreciate it so much!!

I hope you have a great crafty day!

 photo signaturecopy_zpsa1897fa6.png
Supply List:
Scrappy Moms Stamps:

Other Products:
Cardstock: White (Recollections), Melon mambo (SU!)
Patterned paper: Summer Days (Echo Park)
Ink: Jet Black Archival (Ranger)
Dies: Trio Stitched Banners, Stitched Lollipop Holder, Stitched Party Dies (MCT)
Misc.: Crochet Thread, Foam Adhesive
Monday, March 30, 2015

Bitten By The Bug 2 -- Use A Bunny

Happy Monday!

Are you guys ready for another fun challenge that starts today over at

This week, we want to see your projects that feature a bunny rabbit.

Here is what I created for the challenge:


When I saw what the theme was for this challenge, all I could see was Easter which made me think of  a few things, including Easter baskets and chocolate bunnies so I decided I would take that and run with it. :) I cut my basket, eggs and chocolate bunny out of the Create A Critter 2 Cricut cartridge. I ran the bottom half of my basket through my cuttlebug using a houndstooth embossing folder for a little texture. I then popped up the basket rim with some foam adhesive. I added the eggs and adhered that to my white card layer. I then adhered another egg to the front and popped up my bunny with some foam adhesive. For the bow on  my basket, I used a die from My Creative Time. I added a few doodles with my white gel pen onto the grass and a pearl to the bow as well as to the bunny's bow tie. I love both of the Create A Critter cartridges so much! All of the images are so darn cute!

Thanks so much for stopping by my blog and taking a look at my latest creation!
I really appreciate it! 

Don't forget to head over to the Bitten By The Bug blog to see what my Design Team sisters created! After you take a peek at their creations, I hope you will create a project and join us in the challenge!
 I would love to see what you make :) 

I hope you have a great crafty day!


 photo signaturecopy_zpsa1897fa6.png

Supply List:
Cricut Cartridge: Create A Critter 2
Cardstock: Recollections
Patterned Paper: Vintage Bliss (Simple Stories)
Dies: Stitched Rectangular Frame Dies & More and Fun Size Scallop Stitched Bow Die (MCT)
Misc.: Glossy Accents, Pearls, Foam Adhesive, White Gel Pen, Houndstooth Embossing Folder (Cuttlebug)
Sunday, March 29, 2015

Scrappy Moms Stamps March Release Project 2

Happy Sunday!
I hope your weekend has been great so far :) 

Today I have another project to show you that features one of the new sets from 

For this project, I used a stamp from the new set titled:


I loved this sentiment so much and I know so many people that are sick with colds right now, including me, that I thought I would make a get well card. I found this nurse holding a band-aid in the Silhouette store and thought she was so cute, I just had to use her lol! I put a sweet little Peachy Keen face on her and kept my card pretty simple and easy to mail. 

Here is a look at the Sassy Pants set:

and just in case you missed it, here is a look at the other new set titled

Be sure to stop by and see our March Guest Designer, Georgianna from Carson's Creations 
as well as all of the Scrappy Moms designers all week to see projects showcasing these new stamp sets.
Tammy
Bonnie
Carri
Corri
Debby
JoAnn
Julie
Julie
LeeAnn
Stacey (me)
Sukie
Theresa
Thank you so much for taking the time to stop by my blog and looking at my latest creation!
I appreciate it so much!!

I hope you have a great crafty day!
 photo signaturecopy_zpsa1897fa6.png

Supply List:
Scrappy Moms Stamps:

Other Products:
Cardstock: Real Red (SU!), All Others (Recollections)
Face Stamp: PK-170 Teddy Bear Face Assortment (Peachy Keen)
Ink: Jet Black Archival (Ranger)
Silhouette Store: Nurse Holding BandAid by Stinkin Cute Paper Piecings #44125
Dies: Die-namics Bracket Tab (MFT), Fun Stitched Edges (MCT)
Misc.: Polka Dots Embossing Folder (Cuttlebug), Bling, Enamel Glitter Heart, Glossy Accents, White Gel Pen, Chalk, Foam Adhesive
Friday, March 27, 2015

Scrappy Moms Stamps March Release

Happy Friday!!!

Today Scrappy Moms Stamps is releasing two new fabulous stamp sets!!


Here is the first card that I created for this release using a new stamp set called:


Masculine cards are so hard for me to make. I thought this file of a man fishing in his boat would be perfect for a masculine birthday card though so I gave it a shot. I added my water layer to the very bottom of my white layer and actually let it hang off a little and I love the way that looked. I added a bit of glossy accents to the water and to the fish. I used some distress ink to create the clouds in the sky. For my greeting, I stamped that greeting from the Zodiac Cuties set and notched the ends and then attached it to my top card layer with a staple. 

Here is a complete look at both the sets that are being released today:


Awesome huh?

Be sure to stop by and see our March guest designer, 
Georgiana from Carson's Creations - http://carsonscricutcreations.blogspot.com/
as well as all of the Scrappy Moms designers all week to see projects showcasing these new stamp sets.
Tammy
Bonnie
Carri
Corri
Debby
JoAnn
Julie
Julie
LeeAnn
Stacey (me)
Sukie
Theresa

Thank you so much for taking the time to stop by my blog and looking at my latest creation!
I appreciate it so much!!

I hope you have a great crafty day!

 photo signaturecopy_zpsa1897fa6.png

Supply List:
Scrappy Moms Stamps:

Other Products:
Cardstock: White & Black (Recollections), Old Olive, Pear Pizzazz (SU!), Blue (Bazzill), All Others (DCWV)
Patterned Paper: Scoot (Echo Park)
Ink: Tuxedo Black (Memento), Broken China Distress (Ranger)
Silhouette: Man Fishing (Miss Kate's Cuttables)
Misc.: Glossy Accents, Foam Adhesive, Stapler
Wednesday, March 25, 2015

Stretch Your Dies---Day 4

Happy Wednesday!

Today I am back with another card that I made for the 
Stretch Your Dies class from Online Card Classes.


Today's class was about getting maximizing your card design and getting two cards by using the negative as well as the positive to create two cards with the same layout yet a different look on each. This technique was shown to us by Kristina Werner.

Here are the cards that I created using this technique:


Thanks so much for stopping by and taking a look at my latest creation!
I really appreciate it!

I hope you have a great crafty day!!
 photo signaturecopy_zpsa1897fa6.png

Supply List:

Cardstock: Neenah Solar White & Watercolor Cardstock
Dies: 4x4 Journal Die + More, Stitched Heart Layering Dies, Happy Thoughts (MCT)
Misc.: Crayola Watercolors, Foam Adhesive
Tuesday, March 24, 2015

Stretch Your Dies---Day 3

Happy Tuesday!!

Today I am back with another card that I made for the 
Stretch Your Dies class from Online Card Classes.


For my card I used a technique that was shown to us by 
Karolyn Loncon, which was masking a die cut to create and scene and then taking the same die cut and using it to dry emboss.  

Here is the card that I created:


For my mask, I used the large heart die from the Heart 2 Heart Love Frame set from My Creative Time. I created a little outdoor scene by using some Broken China & Peeled Paint Distress Inks from Ranger and then I used the same die to dry emboss to get that fun stitching around the heart.  I then stamped and colored the little girl using my copics. I fussy cut her out and then popped her up using some foam adhesive. 

Thanks so much for stopping by and taking a look at my latest creation!
I really appreciate it!

I hope you have a great crafty day!!
 photo signaturecopy_zpsa1897fa6.png

Supply List:
Cardstock: Neenah Solar White
Dies: Heart 2 Heart Love Frame (MCT)
Stamps: Mini Messages (Scrappy Moms), Home Sewn (MCT), Mimi in Paris (Penny Black)
Inks: Tuxedo Black(Memento), Broken China & Peeled Paint Distress Inks (Ranger)
Copics: BV01, BV02, E00, B21, E23, E25
Misc.: Wink Of Stella, Foam adhesive
Monday, March 23, 2015

Bitten By The Bug 2 -- Use A Frame


Happy Monday!

Are you guys ready for another fun challenge that starts today over at

This week we are challenging you to use a frame from one of your Cricut cartridges.

Here is the card that I created for the challenge:

To create my card, I welded two of the shadow layers for the wood frame together to create my card base. I then layered the wood frame on top and added the Winnie The Pooh peeking over holding the balloon. All of my images were cut from the Disney Pooh and Friends Cricut cartridge, except for the banner which is a die from My Creative Time. This card was so simple to make and took less than 30 minutes to put together. I was going to add a sentiment to the front but decided to keep the focus on Winnie and add the greeting to the inside of the card. Winnie The Pooh is one of my all time favorite Disney characters so I think this card is absolutely adorable but I may be a little biased since he is one of my favorites ;) 

Thanks so much for stopping by my blog and taking a look at my latest creation!
I really appreciate it! 

Don't forget to head over to the Bitten By The Bug blog to see what my Design Team sisters created! After you take a peek at their creations, I hope you will create a project and join us in the challenge!
 I would love to see what you make :) 

I hope you have a great crafty day!

 photo signaturecopy_zpsa1897fa6.png

Supply List:
Cricut Cartridge: Pooh & Friends
Cardstock: White, Black, Kraft (Recollections). Real Red, Pacific Point, Daffodil Delight & Crushed Curry (SU!).
Patterned Paper: SU!
Dies: Stitched party Dies (My Creative Time)
Misc.: White Gel Pen, True Blue Stickles, Glossy Accents, Foam Adhesive, Bling, Twine.
Saturday, March 21, 2015

Birthday Gift with Washi

Happy Saturday!
Today I get to show you a super simple favor box that I created and no patterned paper was used, only that gorgeous Washi tape from Love My Tapes
The tapes I used on my project are:


&


Here is my project:

I used the Candy Caddy From Jaded Blossom to create my little treat bag. I then laid out some strips of Washi tape onto some white cardstock scraps and used some balloon dies from My Creative Time to cut them out. I stamped a greeting onto the bag using a stamp from Scrappy Moms and then placed some of the Pink Chevron washi along the bottom edge. I popped my balloons up using some foam adhesive and then tied some strings onto the balloons. I cut the strings rather short with the hopes that they would appear to be forming the sentiment. Not quite sure if that worked or not but I went with it haha! After the bag was decorated, I wrapped each piece of chocolate with a piece of white cardstock and then more Washi.


I think these would make the perfect little party favors or even a simple but cute birthday gift for a co worker, neighbor, etc. 


Thank you all so much for stopping by!
I really appreciate it!

I hope you have a great crafty day!

 photo signaturecopy_zpsa1897fa6.png

Supply List:
Love My Tapes:

Other Products:
Cardstock: Recollections
Stamp: In Line Sentiments (Scrappy Moms)
Ink: Jet Black Archival (Ranger)
Dies: Candy Caddy (Jaded Blossom), Stitched part Dies (My Creative Time)
Misc.: Sequins, Bling, Ribbon, Foam Adhesive
Thursday, March 19, 2015

Stretch Your Dies--Day 2

Hi!
I'm back with another card that I made for the 
Stretch Your Dies online class from Online Card Classes .


This is the card that I made using a technique card "die cuts within a larger die" taught to us by Kristina Werner.


I thought this was going to be really difficult but it was actually quite easy. I had a lot of fun with this card! I even got to watercolor which I love but rarely do. :) 

Thanks so much for stopping by and taking a look at my latest creation!
I really appreciate it!

I hope you have a great crafty day!!
 photo signaturecopy_zpsa1897fa6.png

Supply List:
Cardstock: Watercolor Cardstock & Neenah Solor White
Inks: Fired Brick, Worn Lipstick, Tattered Rose & Peeled Paint Distress Inks (Ranger)
Dies: Bunch Of Fun Circles , Stitched Pretty Flowers & Leaves, Speech Bubble Sentiments (My Creative Time)
Misc.: Foam Adhesive, Ribbon, Glossy Accents, Corner Chomper (We R Memory Keepers)

Stretch Your Dies--Day 1 (card 2)

Hi everyone!
Me again! I have been so busy that I am trying to play catch up with some blog posts so please forgive me for posting twice in one day :)

I'm back with another card that I made for the 
Stretch Your Dies online class from Online Card Classes


Julie Ebersole taught us this super cool technique where we created a on the edge card. This allows you to create a little flap to where one half of your card is actually held shut by the die cut edge. 
The die I wanted to use was a little small though so I decided to make a gift card holder instead of an A2 sized card using this technique.


Opened and showing the partial die cutting that creates the "lock":


Thanks so much for stopping by and taking a look at my latest creation!
I really appreciate it!

I will be back a little later on today to show you another card that I created from the Day 2 lesson.
I hope you have a great crafty day!!

 photo signaturecopy_zpsa1897fa6.png

Supply List:
Cardstock: Recollections, Gold Glitter (AC)
Die: Tag Die Layers (My Creative Time)
Stamp: Birthday Buddies (My Creative Time)
Ink: Tuxedo Black  Ink (Memento)
Misc.: Prismacolor Colored Pencils, Gamsol, Sequins, Ribbon, Wink Of Stella Clear Glitter Brush

Stretch Your Dies Online Card Class


Happy Thursday!!

Today I will be posting a couple of cards that I made for the 
Stretch Your Dies online class from Online Card Classes


The first card I made was from a technique that Jennifer McGuire showed us. This technique was all about how to get more from your dies by using some fun foam, die cutting it out and then shrinking it to get a slightly smaller word. I thought this was so cool! Often I have wanted to use one of my word dies but it was just a little too big. Now I know a way to make them slightly smaller. :)  


For my card, I simply colored my fun foam with a black marker once I shrunk it so that it popped against that sea of white. I added a bit of glitter cardstock to the side along with some hot pink striped paper and finished it off with a few sequins. 

Thanks so much for stopping by and taking a look at my latest creation!
I really appreciate it!

I will be back a little later on today to show you another card that I created from the Day 1 lesson.
I hope you have a great crafty day!!

 photo signaturecopy_zpsa1897fa6.png

Supply List:
Cardstock: White (Neenah), Black (Georgia Pacific), Silver (AC)
Patterned Paper: AC
Die: Label card Thinlits (SU!)
Misc.: Fun Foam, Sequins, Black Sharpie
Tuesday, March 17, 2015

Terrific Tuesday Challenge---Pink & Yellow

Happy Tuesday!

Are you all ready for a new Terrific Tuesday Challenge over at the Scrappy Moms blog?

Photobucket

The theme for this Terrific Tuesday Challenge is....
Color Challenge---Use Pink & Yellow

I thought that color combo was perfect for a Spring type of card so I decided to make a Easter card.


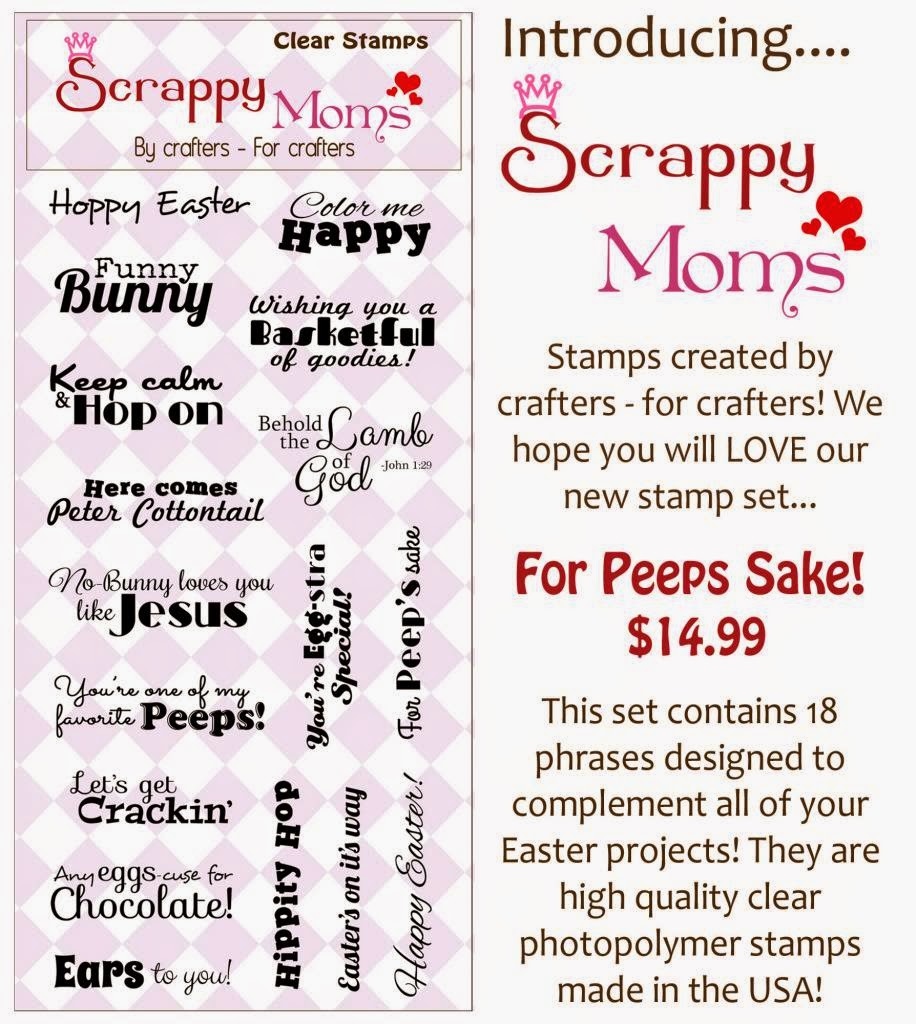
I thought this little SVG from KaDoodle Bug was so cute that I just had to use it for my card. I made a square card and cut out the scallop square layer from the Elegant Edges Cricut Cartridge. I popped it up onto the front of my card with some foam adhesive so that I didn't end up with a "bump" underneath from the ribbon placement. Isn't that greeting cute? It is from the For Peep's Sake set by Scrappy Moms. I decided to add some liquid applique to the bunny tail and then using my heat gun so that it would puff up and give the appearance of cotton to coordinate with my greeting.

Here is a look at the entire For Peep's Sake set:


Cute huh? I love this set!

I hope you will stop by the Scrappy Moms Blog to see the fabulous creations my wonderful Design Team sisters created for this challenge as well as entering the challenge yourself!
 I would love to see what you create!

Thanks so much for stopping by my blog and taking a look at my latest creation!
I really appreciate it!

I hope you have a great crafty day!

 photo signaturecopy_zpsa1897fa6.png

Supply List:

Scrappy Moms Stamps:
For Peep's Sake

Other Products:
Cardstock: Recollections
Patterned Paper: SU!
Inks: Jet Black Archival (Ranger), Gray (Studio G)
Cricut Cartridge: Elegant Edges
SVG: Bunny Babies (KaDoodle Bug Designs)
Face Stamp: PK-1320 In The Garden Face Assortment (Peachy Keen)
Misc.: Sequins, Ribbon, Liquid Applique, Glossy Accents, Foam Adhesive, Wink Of Stella Clear Glitter Brush, White Gel Pen, Chalk
Monday, March 16, 2015

Bitten By The Bug 2 --- Use A Shamrock

Happy Monday!

Are you guys ready for another fun challenge that starts today over at

In honor of St. Patrick's Day being tomorrow, this week is all about showing us your projects that feature a Shamrock from one of your Cricut Cartridges. 

I decided to make a little treat bag to hold some candy in to give to someone tomorrow.


I used my Gift Bag Punch Board to make my little bag. I then added a little scallop border all the way around the top by punching a thin strip with a scallop border punch. I cut my shamrocks out of the Celebrate With Flourish Cricut Cartridge and layered it onto some circles and added a few sequins for a bit more sparkle. Instead of adding handles to my bag, I simply threaded the gold ribbon through the holes and tied it closed with a bow in the front of the bag. I think it came out super cute and I love all that gold sparkle!

Thanks so much for stopping by my blog and taking a look at my latest creation!
I really appreciate it! 

Don't forget to head over to the Bitten By The Bug blog to see all the shamrock projects my Design Team sisters created! After you take a peek at their creations, I hope you will create a project and join us in the challenge! I would love to see what you make :) 

I hope you have a great crafty day!

 photo signaturecopy_zpsa1897fa6.png

Supply List:

Cricut Cartridge: Celebrate With Flourish
Cardstock: Black and White (Recollections), Green and Gold Glitter (AC)
Dies: Bunch Of Fun Circles (MCT)
Misc.: Scallop Sentiment Border Punch (Fiskars), Ribbon, Gift Bag Punch Board (We R Memory Keepers), Foam Adhesive, Sequins
Monday, March 9, 2015

Bitten By The Bug 2 --- Use A Birdcage

Happy Monday!

Are you guys ready for another fun challenge that starts today over at

This week, we want to see your projects that feature a birdcage.

Here is what I created for the challenge:


For my card, I decided to go for a elegant feel. I let the patterned paper be my inspiration and everything just came together pretty easily. I added some lace to the back of my my embossed white layer and popped it up with some foam adhesive for some dimension. My birdcage came from the French Manor Cricut cartridge. I added a few pearls to my cage as well as a ribbon bow and a little bit of ribbon for the cage to "hang'. I added some pretty little roses to the corner and curled the green wire for a bit of interest. You can't really tell in this picture but I added some glossy accents to the bird. I didn't add a sentiment to it just yet. I will add one to the inside when the time comes to use the card or I may just end up leaving it blank so that I can use it for a no occasion needed type of card.  I am so happy with how this turned out!

Thanks so much for stopping by my blog and taking a look at my latest creation!
I really appreciate it! 

Don't forget to head over to the Bitten By The Bug blog to see what my Design Team sisters created! After you take a peek at their creations, I hope you will create a project and join us in the challenge!
 I would love to see what you make :) 

I hope you have a great crafty day!

 photo signaturecopy_zpsa1897fa6.png

Supply List:
Cardstock: Recollections
Patterned Paper: In Bloom (MME)
Cricut Cartridge: French Manor
Dies: Stitched Rectangular Frame Dies & More (MCT)
Misc.: Pearls, Ribbon, Glossy Accents, Flowers, Lace, Foam Adhesive, Paper Lace II Companion Embossing Folder (Cuttlebug)
Tuesday, March 3, 2015

Terrifc Tuesday Challenge-- All You Need Is Love

Happy Tuesday!

Are you all ready for a new Terrific Tuesday Challenge over at the Scrappy Moms blog?

Photobucket

The theme for this Terrific Tuesday Challenge is....
All You Need Is Love

Here is the card that I created for the challenge:


Lovey dovey cards are one of my most favorite types of cards to make. I love making them and then hiding them somewhere for a member of my family to find them, just because. Whether it is a lunchbox, in the car, or even sandwiched between some folded laundry. It always seems to help brighten up their day, if they are having a bad one, when they find them.  For this card, I used a sweet little girl SVG that I found at My Scrap Chick. Isn't she darling? I paired her up with that super sweet sentiment from the Smitten set by Scrappy Moms Stamps. I heat embossed my greeting using some white embossing powder to make it pop off of that dark pink cardstock. 

Here is a look at the entire Smitten set:


I love this set so much!

I hope you will stop by the Scrappy Moms Blog to see the fabulous creations my wonderful Design Team sisters created for this challenge as well as entering the challenge yourself!
 I would love to see what you create!

Thanks so much for stopping by my blog and taking a look at my latest creation!
I really appreciate it!

I hope you have a great crafty day!

 photo signaturecopy_zpsa1897fa6.png

Supply List:
Scrappy Moms Stamps:
Smitten

Other Products:
Cardstock: Melon Mambo (SU!), All Others (Recollections)
Patterned Paper: Happy Day (MME)
Face Stamp: PK-640 Princess Face Assortment (Peachy Keen)
SVG: Tiddly Inks Anna Belle Sweetness (My Scrap Chick)
Ink: VersaMark & Jet Black Archival (Ranger)
Misc.: Scallop Sentiment Border Punch (Fiskars), Ribbon, White Embossing Powder, Glossy Accents, Swiss Dots Embossing Folder (Cuttlebug), Foam Adhesive, Wink Of Stella Clear Glitter Brush
Related Posts Plugin for WordPress, Blogger...